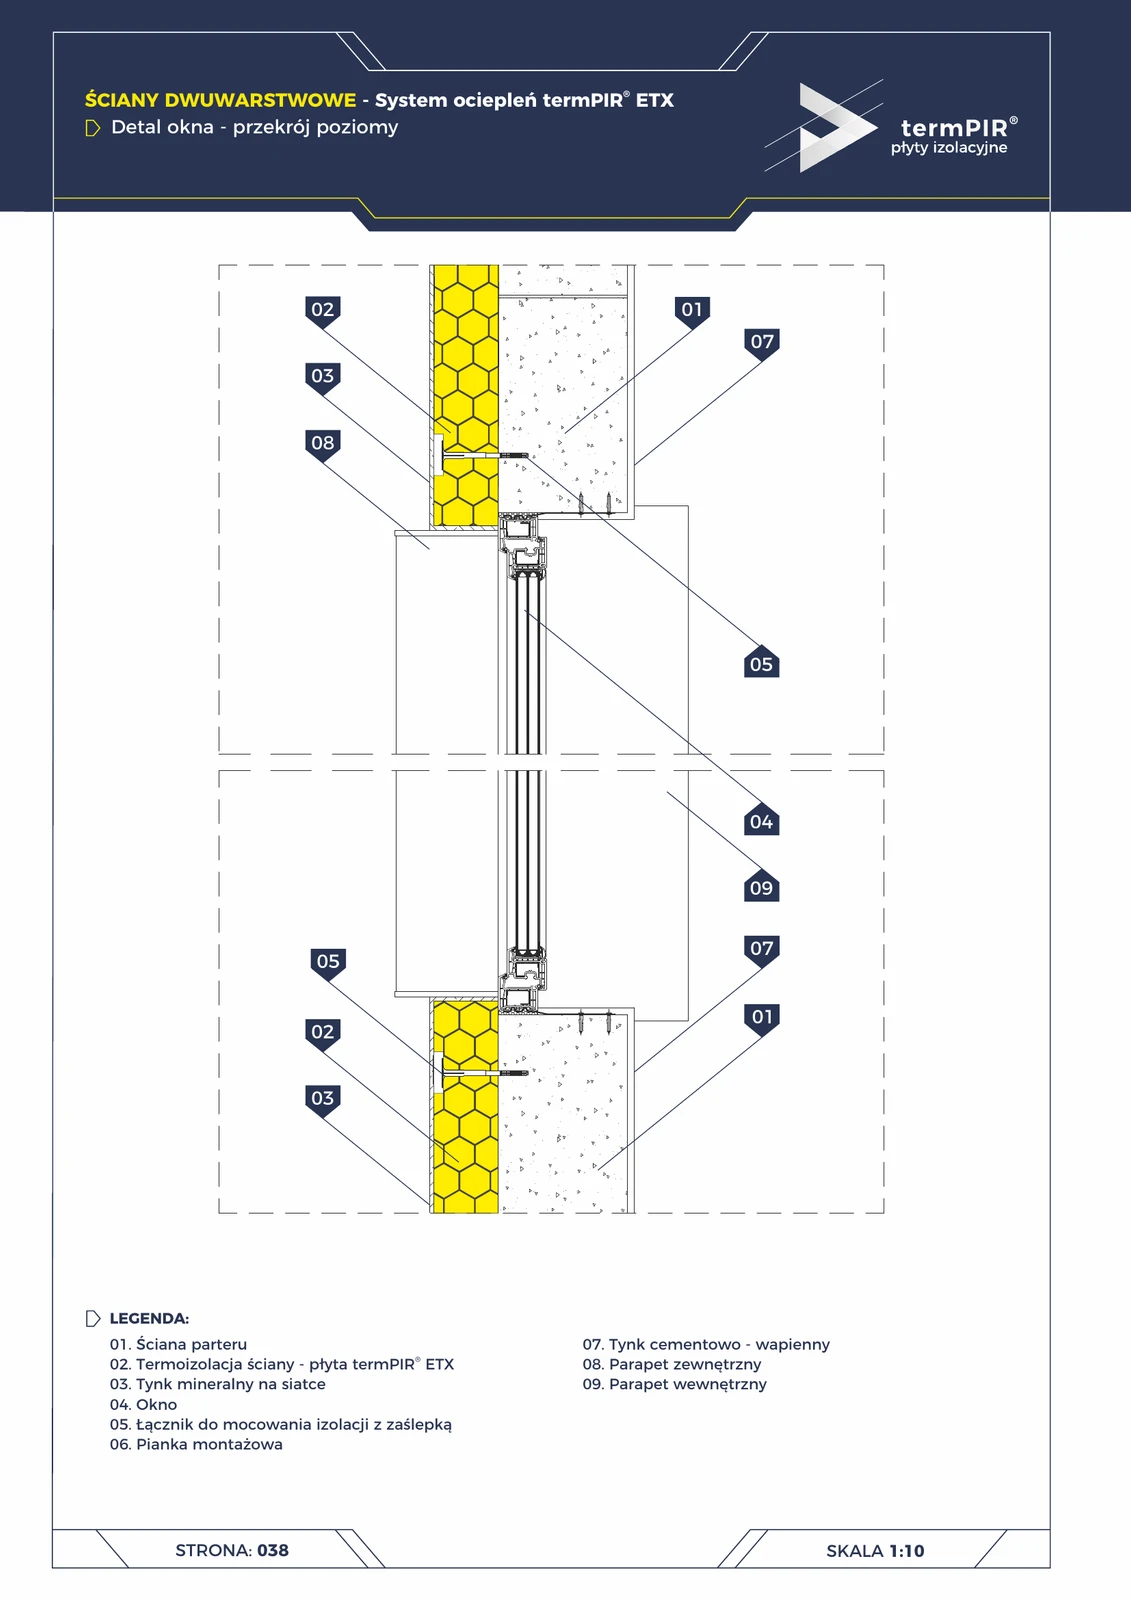
Function of the junction
Horizontal section of a window in ETICS = top-down view; shows what happens on the sides of the window frame. The principles are analogous to the vertical section, but with particular emphasis on:
- Continuity of termPIR® ETX around the window frame (top, bottom, sides in this detail).
- Low-expansion installation foam (item 06) fills the 5–15 mm gap between the frame and the reveal.
- Side sill flashings (item 08) — edges of aluminium sheet folded up and bonded to the top sill, sealed with mastic.
Critical installation aspects
- Side ETX board (item 02) in the reveal — 3–5 cm thick, pressed against the frame with compression onto the foam; without lateral insulation continuity = ψ bridge visible in thermography.
- Installation foam (item 06) applied from bottom to top; trim excess after curing (typically 12–24h), cover with vapour-tight installation tape on the interior side.
- Side sill flashing (item 08) — 25 mm upward fold on both sides of the window, fixed with aluminium rivets to the top sill; sealed with neutral silicone in the corners.
- Bonding the window frame to the wall — three-layer sealing system: foam (middle) + vapour-permeable tape (exterior) + vapour-tight tape (interior) in accordance with the RAL “Energy-efficient window” guideline (DIN 18355).
- Ring beam / lintel: if recessed into the wall → ETX insulation continued across the ring beam (cut strips, geometrically fitted).
Documentation
Technical Catalogue termPIR® — Residential Buildings (Gór-Stal 2022), page 36 — Two-layer ETICS wall, window detail, horizontal section. Scale 1:10.
Components in this junction
Insulation (1)
- 02 Wall thermal insulation — termPIR® ETX board
Fastener (1)
- 05 Insulation fixing anchor with cap
Sealant (1)
- 06 Low-expansion installation foam
Element (6)
- 01 Ground-floor load-bearing wall
- 03 Mineral render on mesh
- 04 Window (PVC / aluminium frame)
- 07 Cement-lime plaster (interior)
- 08 Exterior window sill (side flashing)
- 09 Interior window sill