Thermal Bridges at Window Joints with PIR — 6 Details with Isotherms
“40% of heat loss goes through thermal bridges”
This is the most frequently quoted figure in the insulation industry. And it is true for houses with a poor window detail. In a well-designed house, thermal bridges account for 5–10% of losses.
The difference? The details. Specifically: how the window reveals (jambs, sill, lintel) are insulated. Where the wall meets the window is the weakest part of the insulation. Every design error multiplies the heat loss many times over.
In this article we present 6 proven details for insulating window reveals with PIR, with specific psi formulas (ψ — the linear heat-loss coefficient) and isotherms (a simulation of the temperature distribution).
What ψ (psi) is and why it matters
ψ = the linear heat-loss coefficient of a thermal bridge [W/(m·K)]. For every linear edge of a building envelope (wall-window connection, corner, slab), the window manufacturer or designer provides a ψ value.
ψ values for a typical window:
- Ideal detail (full insulation, no bridges): ψ = 0.01–0.04 W/(m·K)
- Good detail (typical modern house): ψ = 0.05–0.10
- Average detail (old joinery, carelessly insulated): ψ = 0.15–0.25
- Poor detail (reveals not insulated): ψ = 0.30–0.60
For a 1.2×1.5 m window the perimeter = 5.4 m. Annual loss through the bridge:
Annual loss = ψ × perimeter × temperature difference × heating period
            = ψ × 5.4 × 25°C × 5000h × 8.76 kWh/PLN
            = ψ × 5916 kWh/year (roughly 2400 PLN/year at 0.40 PLN/kWh)
| ψ | Annual loss, 1 window | Annual loss, 10 windows |
|---|---|---|
| 0.02 (excellent detail) | 118 kWh = 47 PLN | 1,180 kWh = 470 PLN |
| 0.10 (good) | 592 kWh = 237 PLN | 5,916 kWh = 2,370 PLN |
| 0.25 (average) | 1,479 kWh = 591 PLN | 14,790 kWh = 5,916 PLN |
| 0.50 (poor) | 2,958 kWh = 1,183 PLN | 29,580 kWh = 11,832 PLN |
A good detail vs a poor detail = a difference of 11,000 PLN per year for a typical house. Over 25 years of operation = 275,000 PLN. That is 5× the value of all the window joinery.
Anatomy of a thermal bridge at a window
Every window has 5 typical thermal bridges:
            LINTEL
              ↓
         ┌────────┐
JAMB →   │ window │ ← JAMB
         │        │
         └────────┘
              ↑
            SILL
              +
       (window installation in the wall)
- Lintel — the load-bearing element above the window, usually reinforced concrete or steel (conducts heat 25–50× better than insulation)
- Sill — the lower element of the reveal, often the weakest (because of moisture and inaccessibility)
- Jambs (×2) — the side elements of the reveal, requiring insulation from the exterior side
- Window fixing in the wall — the window is fixed with steel anchors → a point bridge
In total 5 bridges per window. Each requires a separate detail.
Detail 1 — Sill (the most common problem)
Problem: the sill is often a blind spot in the design. The exterior insulation (ETICS) stops 5 cm below the window, the aluminium or conglomerate sill protrudes. Beneath the sill is bare masonry or a thin layer of adhesive. Loss: ψ ~0.25.
Solution: carrying the PIR insulation under the window at a minimum thickness of 20 mm.
[window joinery]
    [PVC/AL window]
    ╔══════════════╗
    ║  window      ║
    ╚══════════════╝
[aluminium sill with EPDM insulation]
[PIR 20 mm under the sill]  ← new element
[masonry 25 cm]
[PIR ETICS 150 mm on the wall]  ← main insulation
[thin-coat render]
ψ with PIR under the sill: 0.05–0.08 ψ without PIR under the sill: 0.20–0.30
Saving: ~0.15 W/(m·K) × sill length × temperature difference = significant for a typical window.
Detail 2 — Reinforced concrete lintel
Problem: a reinforced concrete lintel has λ = 1.7 W/(m·K). That is 80× worse than PIR. Even 3 cm of reinforced concrete above the window is a powerful bridge.
Solution: PIR under the lintel from the exterior side, ideally a wrapped corner (PIR runs under the concrete + onto the side of the wall).
              [reinforced concrete lintel 150 mm]
         _____|_______________________|_____
        | PIR 30 mm under the lintel |
        ████ ████ ████ ████  (PIR)
        ████        ████ ←  PIR ETICS on the wall above the lintel
        ████        ████
        ╔══════════════╗
        ║  PVC window  ║
        ╚══════════════╝
ψ with PIR under the lintel, 30 mm: 0.06–0.09 ψ without PIR under the lintel: 0.30–0.45
Detail 3 — Jamb (reveal side)
Problem: the window is set back into the wall by ~10 cm (typically). The side surfaces of the reveal (jambs) are bare masonry, not wrapped with ETICS. A linear bridge.
Solution: PIR 20–30 mm on the jamb (from the exterior, under the render), overlapping the window frame.
   wall ETICS
   ┌────────────┐
   │   PIR 150  │
   │            │
   │      ┌──────────────────
   │      │ PIR 20-30 mm on the jamb
   │      │
   │      │  ║════════════════
   │      │  ║  window
   │      │  ║
ψ with PIR on the jamb, 30 mm: 0.04–0.07 ψ without PIR (bare jamb): 0.15–0.25
Detail 4 — Installing the window “in the insulation layer”
Traditionally the window is fixed inside the masonry wall (flush with the inner face of the wall), and the exterior ETICS forms a “channel” around the window. This is a classic design error.
The modern approach: the window is mounted in the insulation layer (set back towards the exterior so that its inner edge is in line with the ETICS face).
OLD VERSION                     NEW VERSION
┌───────────────────┐           ┌───────────────────┐
│ ETICS 150 mm      │           │ ETICS 150 mm      │
│              ┌────┐│           │                  │
│ heat         │win.││           │  ║════════════║  │
│  escapes     │    ││           │  ║  window       │
│  sideways    └────┘│           │  ║              │
│              [wall]│           │  [steel bracket for window support]
│                   │           │  [masonry 25 cm]  │
│                   │           │                   │
└───────────────────┘           └───────────────────┘

ψ ~ 0.15-0.20                   ψ ~ 0.04-0.06
It requires a steel bracket (e.g. Compacfoam, ALU-Star) to carry the window in the ETICS layer. More expensive (+1500 PLN/window), but it eliminates 80% of window thermal bridges.
Detail 5 — Exterior sill with insulation
Problem: an aluminium / sheet-metal sill → a point bridge (the thin sheet conducts heat). Loss ψ ~0.10/m².
Solution: a sill with a PIR backing of 20 mm + isolating strips between the sill and the wall.
[exterior aluminium sill]
[EPDM seal]
[PIR 20 mm as a thermal backing]  ← key
[masonry or ETICS under the sill]
Plus strips of PIR or composite (e.g. Compacfoam) between the metal sill elements and the wall. Standard practice for passive buildings.
Detail 6 — Connection with an external roller shutter
Problem: the external roller-shutter box often has a steel casing protruding beyond the ETICS. All the edges of the box = a thermal bridge.
Solution:
- Roller-shutter boxes with internal insulation (manufacturers such as SOMFY have offered them for a long time)
- PIR around the box externally (wrapping it as with the window frame)
- A roller shutter integrated into the ETICS (the box is set back + wrapped with ETICS)
[wall ETICS 150 mm PIR]
[roller-shutter box 200×200 mm]
   ┌─────────────────┐
   │ PIR insulation  │
   │ inside          │
   │ the box         │
   │  ┌────────────┐ │
   │  │ roller     │ │
   │  └────────────┘ │
   └─────────────────┘
[window + roller shutter]
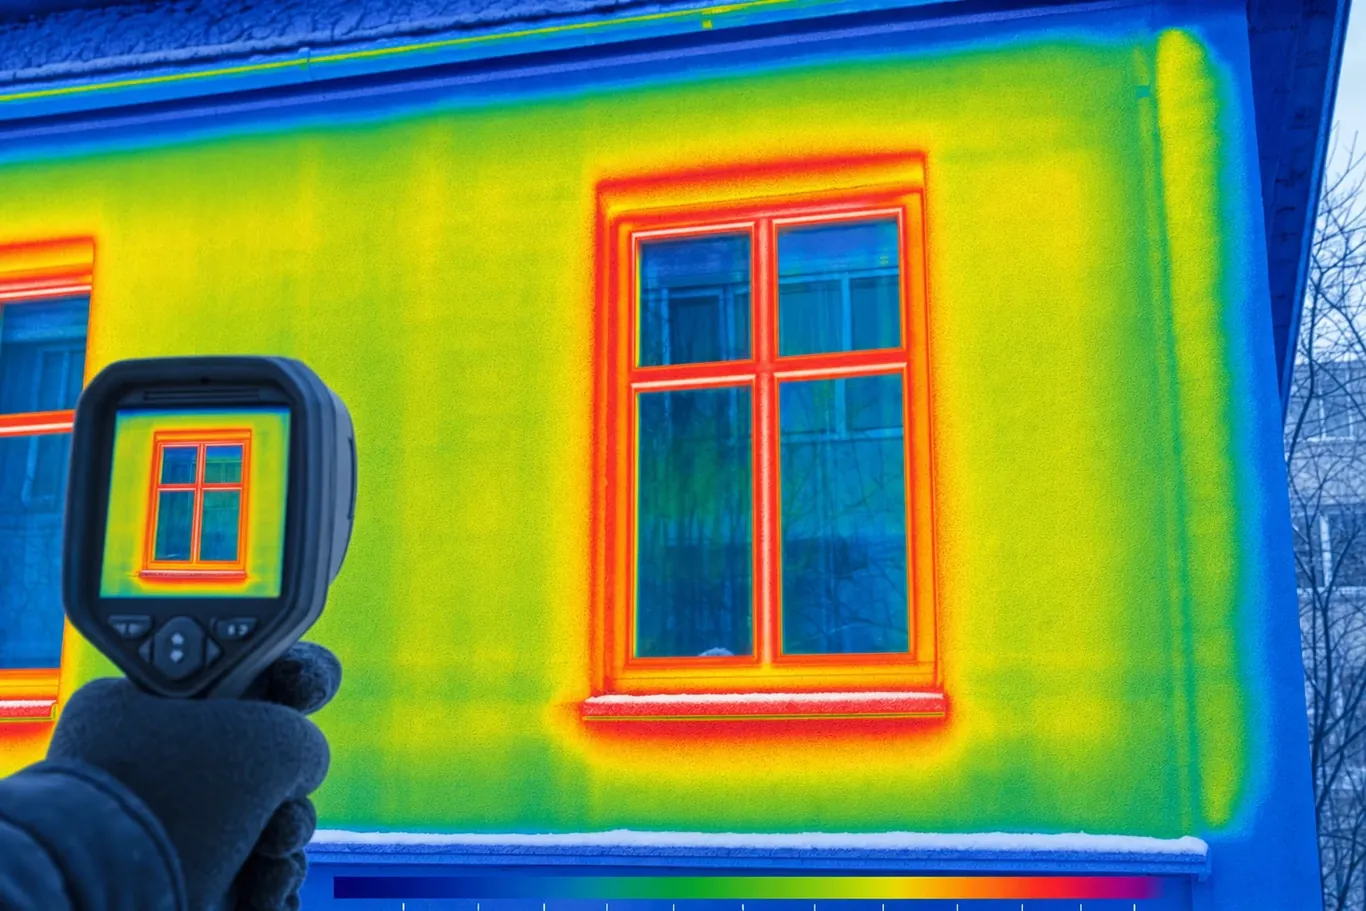
Isotherm — what it is and how to read it
An isotherm = a chart of the temperature distribution across a section of the envelope. It shows where the temperature “drops” below critical (usually 10°C for an interior), where condensation can form, where the bridges are.
In an engineering program (e.g. THERM, FLIXO, KOBRU) the designer draws the window+wall section, defines the materials and their λ, and the program calculates the temperature distribution (at -20°C outside / +20°C inside).
Green zones (temperature ~17°C) = safe, no condensation. Yellow zones (temperature 12–16°C) = borderline, risk of moisture over the long term. Red zones (temperature <10°C) = condensation, risk of mould.
For a good detail, the red zones are only on the outer surface of the pane (the glazing). For a poor detail, the red zones run through the jamb, sill and lintel.
Most PIR manufacturers supply isotherms for typical details — they can be downloaded from the technical files as a template for your own project.
Cost comparison: good vs poor details
A 200 m² house, 10 standard 1.2×1.5 m windows.
| Variant | Extra detail material cost | Average ψ | Annual loss | Loss over 25 years |
|---|---|---|---|---|
| A — no special details, standard ETICS | 0 PLN | 0.30 | ~17,700 kWh | 7,100 kWh/year |
| B — PIR 20 mm under the sill, on the lintels | +800 PLN | 0.15 | ~8,800 kWh | 3,500 kWh/year |
| C — PIR + window in ETICS (brackets) | +15,000 PLN | 0.05 | ~3,000 kWh | 1,180 kWh/year |
| Variant | Annual energy (0.80 PLN/kWh) | Saving over 25 years |
|---|---|---|
| A | ~5,700 PLN/year | 0 PLN |
| B | ~2,800 PLN/year | 72,500 PLN (the 800 PLN pays back in 4 months!) |
| C | ~960 PLN/year | 118,500 PLN (the 15,000 PLN pays back in 3 years) |
Variant B: for a typical house, the best cost-to-effect ratio. Variant C pays back over the long term for passive houses.
What BOKKA offers
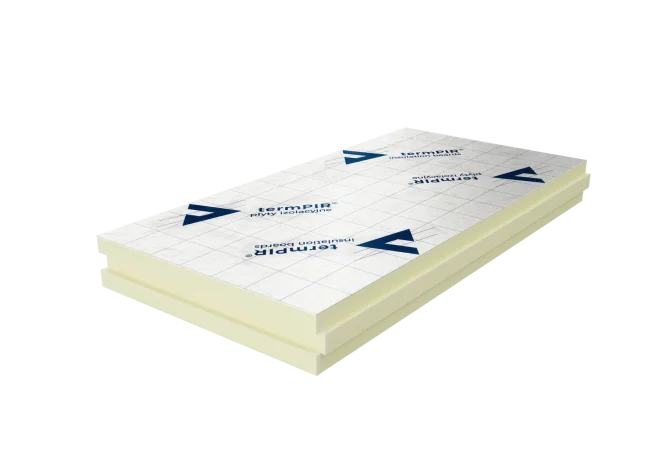
termPIR® AL in thicknesses of 20–40 mm is ideal for window details:
- A thin layer under the sill
- A strip around the window frame
- Jamb insulation
izoGRASS® (PIR without a facing) — easy to cut to size, ideal for non-standard reveals. Low price (~50–60 PLN/m² for 20 mm).
For systemic ETICS projects — termPIR® ETX in thicknesses of 30–250 mm + detail accessories (Compacfoam, vapour-permeable tapes, starter rails).
🤝 Free BOKKA technical consultation — we’ll help select the product and complete documentation for your project.
FAQ
Do I really lose 5,000 PLN a year by not insulating the jamb? Yes, for a typical house with 10 windows and poor details. Most of the heat loss goes through invisible bridges — the designer focuses on the walls, roof and floor. Windows are overlooked in the analyses. It is a costly oversight.
Do you always have to set the window into the insulation layer? No. For WT 2021 a standard window position with PIR on the reveals is sufficient (Variant B in the table). For the passive standard or the most demanding projects — a window in the insulation layer is almost essential.
Can I use polystyrene (EPS) instead of PIR on the reveals? YES, but EPS has a 2× worse λ (0.038 vs 0.022). For the same thermal effect you need a 2× thicker layer of EPS — often physically impossible in a narrow reveal. PIR delivers a greater effect in a smaller thickness.
Won’t the PIR under the sill fall off under the weight of the sill? No, provided the PIR is fixed with adhesive (PU adhesive or polyurea) and the sill has additional fixing to the wall (side clamps). PIR is not a load-bearing element — it serves only as insulation.
What about timber vs PVC vs aluminium windows from the bridge standpoint?
- Timber: λ 0.16 → best (the smallest bridge through the frame)
- PVC with a steel insert: λ ~0.16 with an insulated insert (good)
- Aluminium with a thermal break: λ ~0.22 (worse than timber/PVC)
- Solid aluminium (cold frame): λ 230 (! catastrophic, NEVER in a house)
Is the ψ given by the window manufacturer reliable? Yes, when it is given to PN-EN ISO 10211 (the thermal-bridge standard). European manufacturers usually give realistic values. Polish manufacturers sometimes understate the psi in marketing — check whether the ψ comes from an accredited test or a certified simulation (THERM, FLIXO).
Summary
| Detail | Suggested solution | ψ saving |
|---|---|---|
| Exterior sill | PIR 20 mm under the sill | 0.15 → 0.07 |
| Reinforced concrete lintel | PIR 30 mm under the lintel | 0.40 → 0.08 |
| Jamb | PIR 20-30 mm on the jamb | 0.20 → 0.05 |
| Window fixing | Window in the insulation layer | 0.15 → 0.04 |
| Roller-shutter box | PIR inside the box + externally | 0.18 → 0.06 |
| Metal sill | PIR + composite strips | 0.10 → 0.03 |
An investment in better window details (800–15,000 PLN) pays back in 4 months to 3 years through energy savings. Plus no risk of condensation, mould or moisture damage to the joinery.
🤝 Free BOKKA technical consultation — we’ll help select the product and complete documentation for your project.
Sources:
- PN-EN ISO 10211:2017 — Thermal bridges in building construction
- PN-EN ISO 13788:2013 — Hygrothermal performance of building components and building elements
- DAFA design guidelines (Association of Flat Roof and Façade Contractors)
- Joinery manufacturers: Schueco, Aluprof, Vetrex — ψ technical data sheets
Related products and systems

Read next
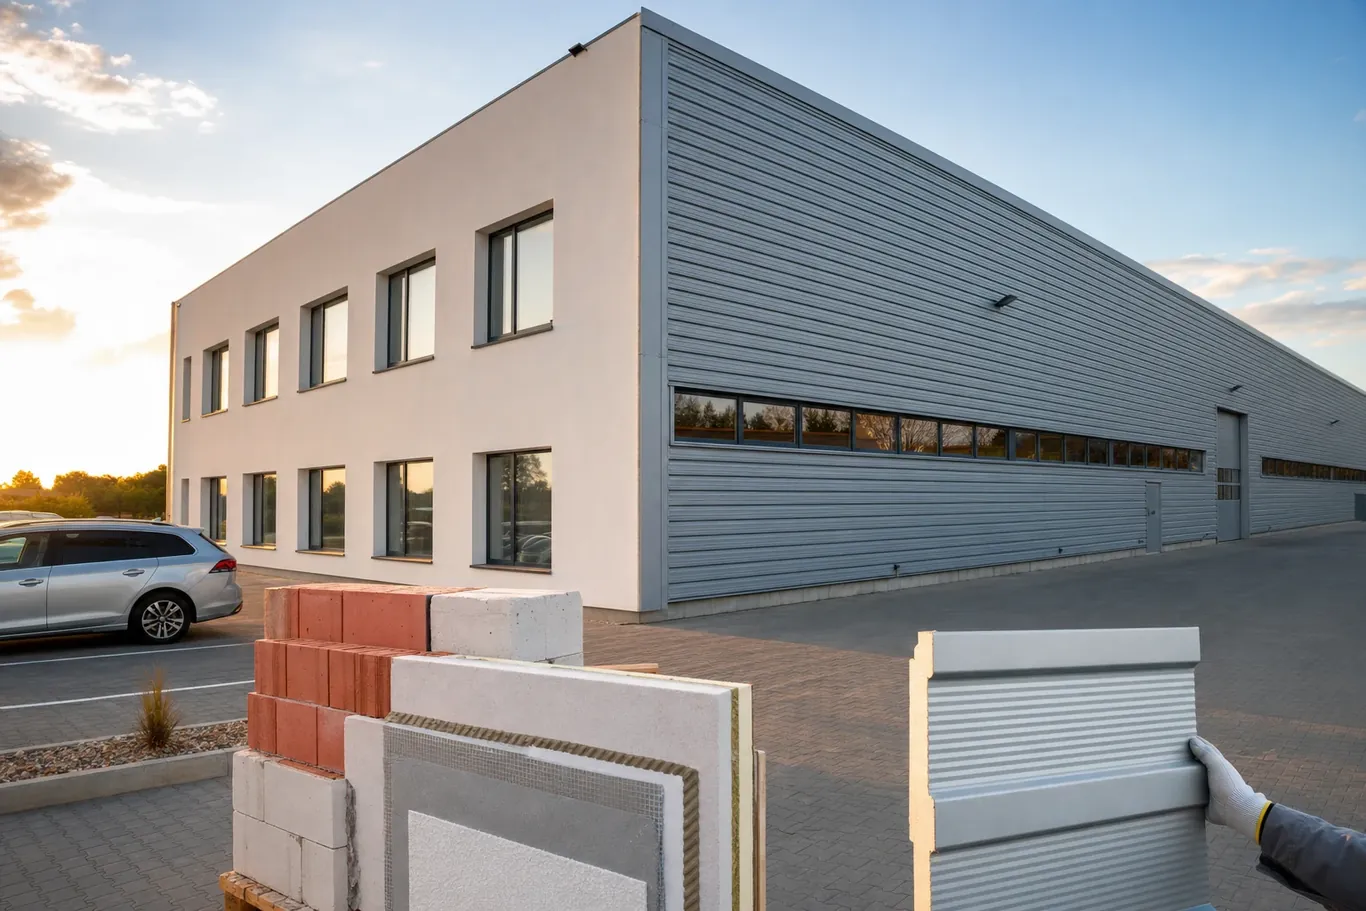
1000 m² Warehouse — termPIR® or Sandwich Panels? Cost, Time, Operation Comparison

PIR vs EPS/XPS vs Mineral Wool: ROI Analysis for Designers | BOKKA

Reaction-to-Fire Euroclasses A1/A2/B/C/D/E/F — What They Mean in Design Practice